
All BOOM! Buster Guides
How to Play BOOM! Buster: BOMs, Combos and Tutorial Skills
A beginner guide to BOOM! Buster built from the release version: the seven tutorial lessons, the REMAINING counter, pipes, combos, deaths and the shield meter.
BOOM! Buster teaches almost everything in its first few minutes, and then spends 60 rounds making you do it faster. This guide follows that structure: what a round asks of you, what each tutorial lesson says, how the right-hand panel works and what is still unknown. It is built from the release version as shown in PhoneInk’s first-look video and the Steam page, checked on 15 November 2026. For the basics of the game itself, start with what BOOM! Buster is.
What is the goal of each round?
You clear a round by getting every live BOM into a pipe. Steam describes the loop as picking up live bombs, platforming across a single screen and sorting each bomb into the correct pipe. Bombs that are not sorted in time explode, and the store page says Bridget drops new BOMs periodically.
In the footage we checked, a round opens with a large number on the right-hand panel labeled REMAINING (between 16 and 18 in the early frames of the rounds we saw), and the number drops as bombs go into pipes. When it hits zero, a ROUND CLEAR! banner appears with a DEATHS line underneath. In the rounds we checked, two pipes sit along the bottom of the screen, and BOMs that match a pipe fill the bin underneath it.
What does each of the seven tutorial lessons teach?
The release version opens with seven short tutorial rounds. Each has a title card, a line or two of on-screen instruction and a white box that turns into a green tick when you finish. The prompts use Xbox-style controller icons: A (green), X (blue), Y (yellow), the D-pad and RT.
| Lesson | Title card | What the prompt tells you |
|---|---|---|
| 1 | Hello World | Press A to jump, press A again in mid-air to double jump, press X to spin |
| 2 | Back Breaker | Hold D-pad down to crouch, then jump (A) while crouching to backflip |
| 3 | Jump, Jump, Dash! | Press RT in mid-air to air-dash |
| 4 | Sort… or Die! | Touch a BOM to pick it up, spin (X) to toss it into the pipe |
| 5 | Rock-a-Bye Baby | Hold D-pad down while spinning (X) to set an item down gently |
| 6 | Stack It! | Stack same-colored BOMs for higher combos |
| 7 | Super Powers | Slime and combos fill the shield meter; press Y when it is full for a shield |
The full button list, with video timecodes, is on the controls page.
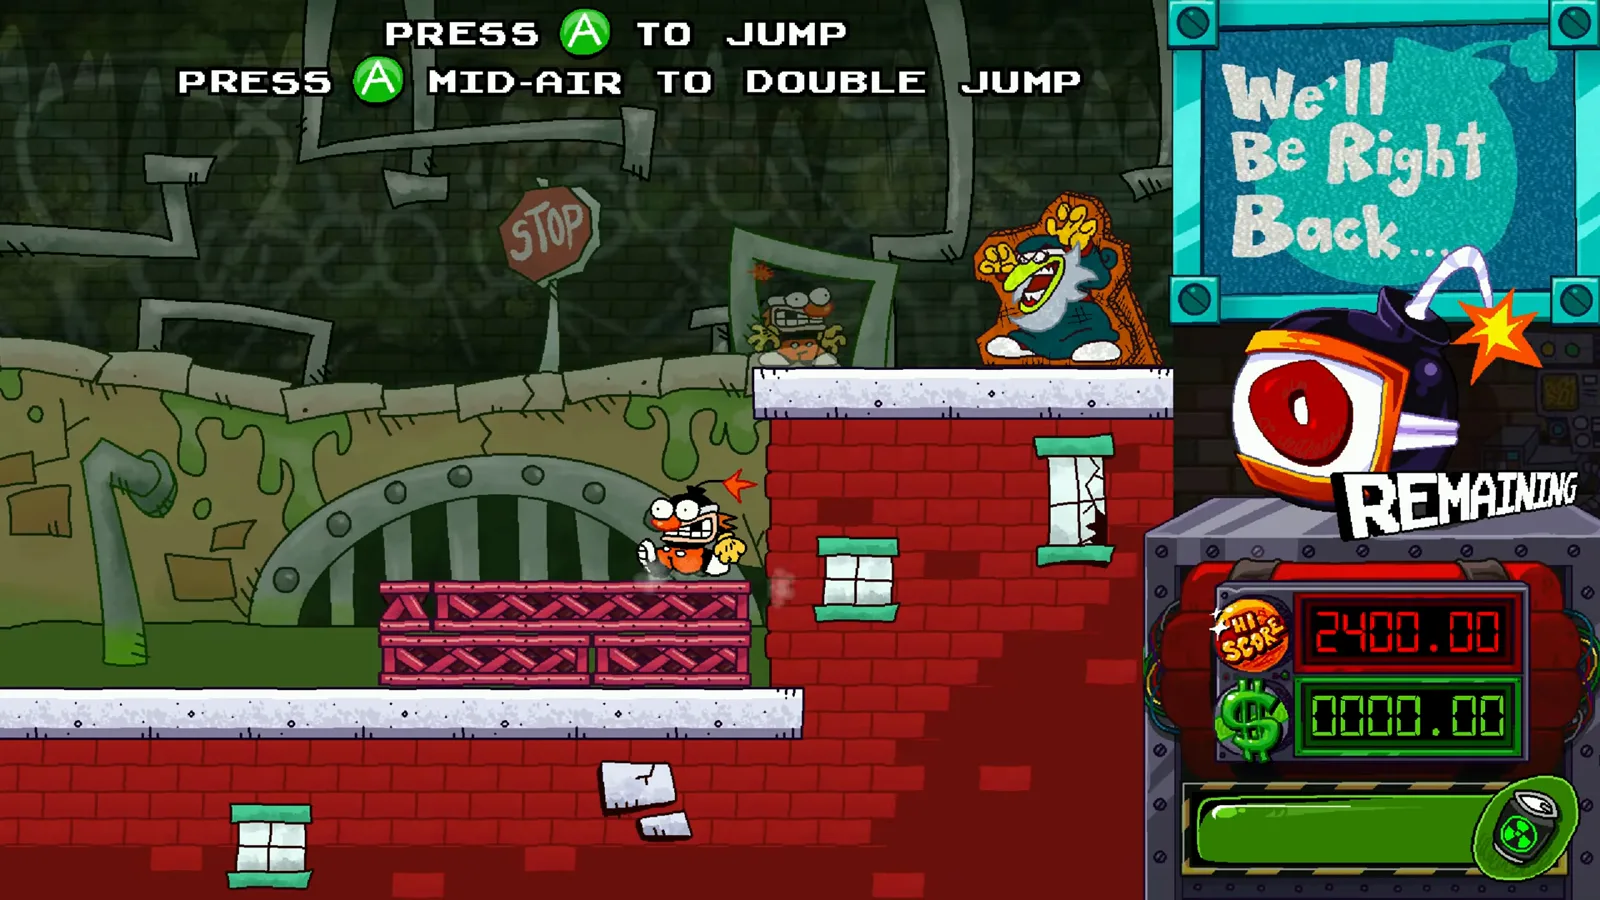
Lesson 1, Hello World: jump and double jump, at 2:53 in PhoneInk’s video. Game art (c) TALLGLASS.
Lesson 4: pick up and toss
Lesson 4 is the first one that uses the pipes. The HUD shows 2 BOMs remaining, an orange pipe and a teal pipe sit in the floor, and the prompt says to touch a BOM to pick it up and spin to toss it in. Carrying a BOM and tossing it is the core action of the whole game, so spend a few seconds here getting a feel for the spin.
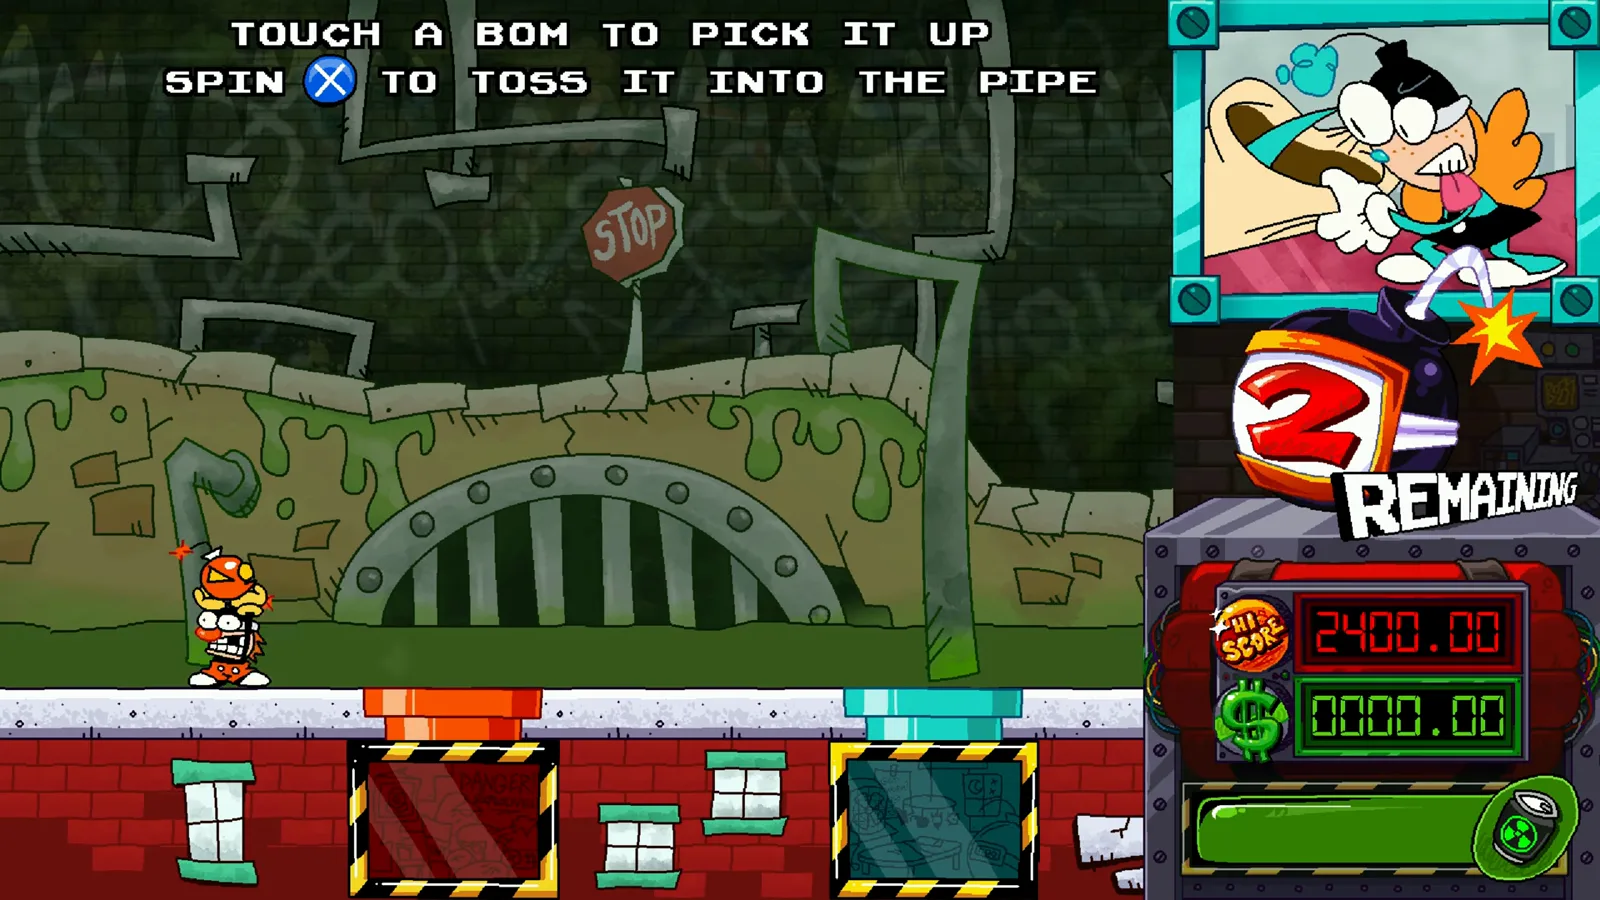
Lesson 4, Sort… or Die!, at 3:52 in PhoneInk’s video. Game art (c) TALLGLASS.
Lesson 6: stacking
Lesson 6 introduces stacking. Pick up several BOMs of the same color and you carry them as a pile over your head, which the prompt says builds higher combos. The same pile shows up in a regular round later in the footage.
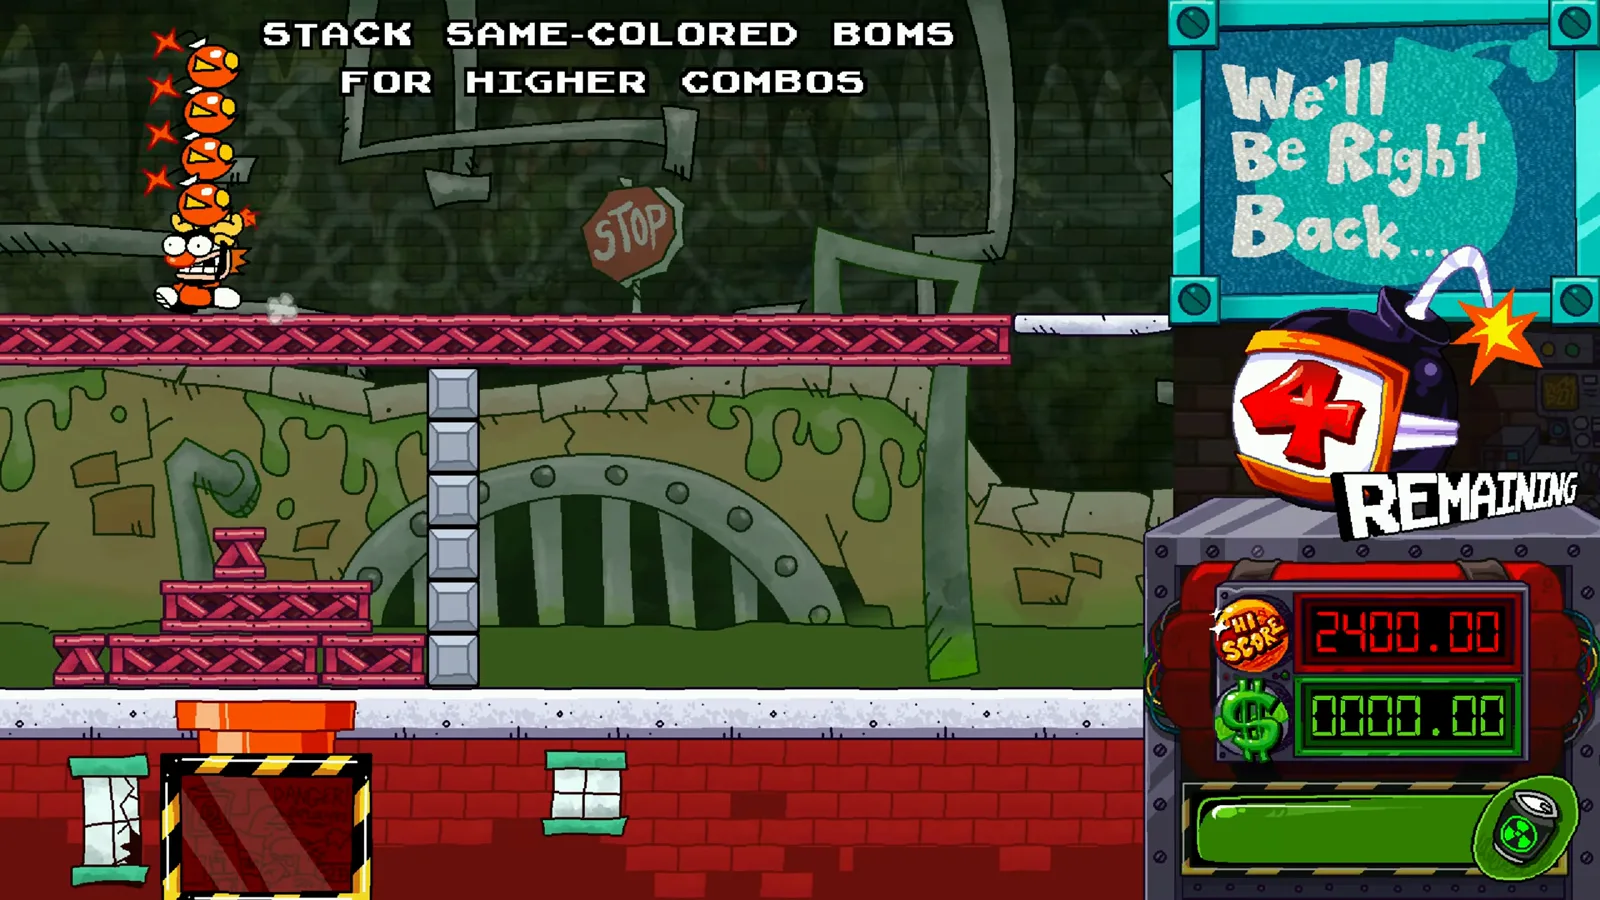
Lesson 6, Stack It!, at 4:26 in PhoneInk’s video. Game art (c) TALLGLASS.
Lesson 7: shield and slime
Lesson 7 has two screens of text. First: slime and combos fill up the shield meter, and when the meter is full you press Y for a shield. Second: slime also gives BOMs extra time, which is useful for higher combos. In the footage, slime appears as a green orb.
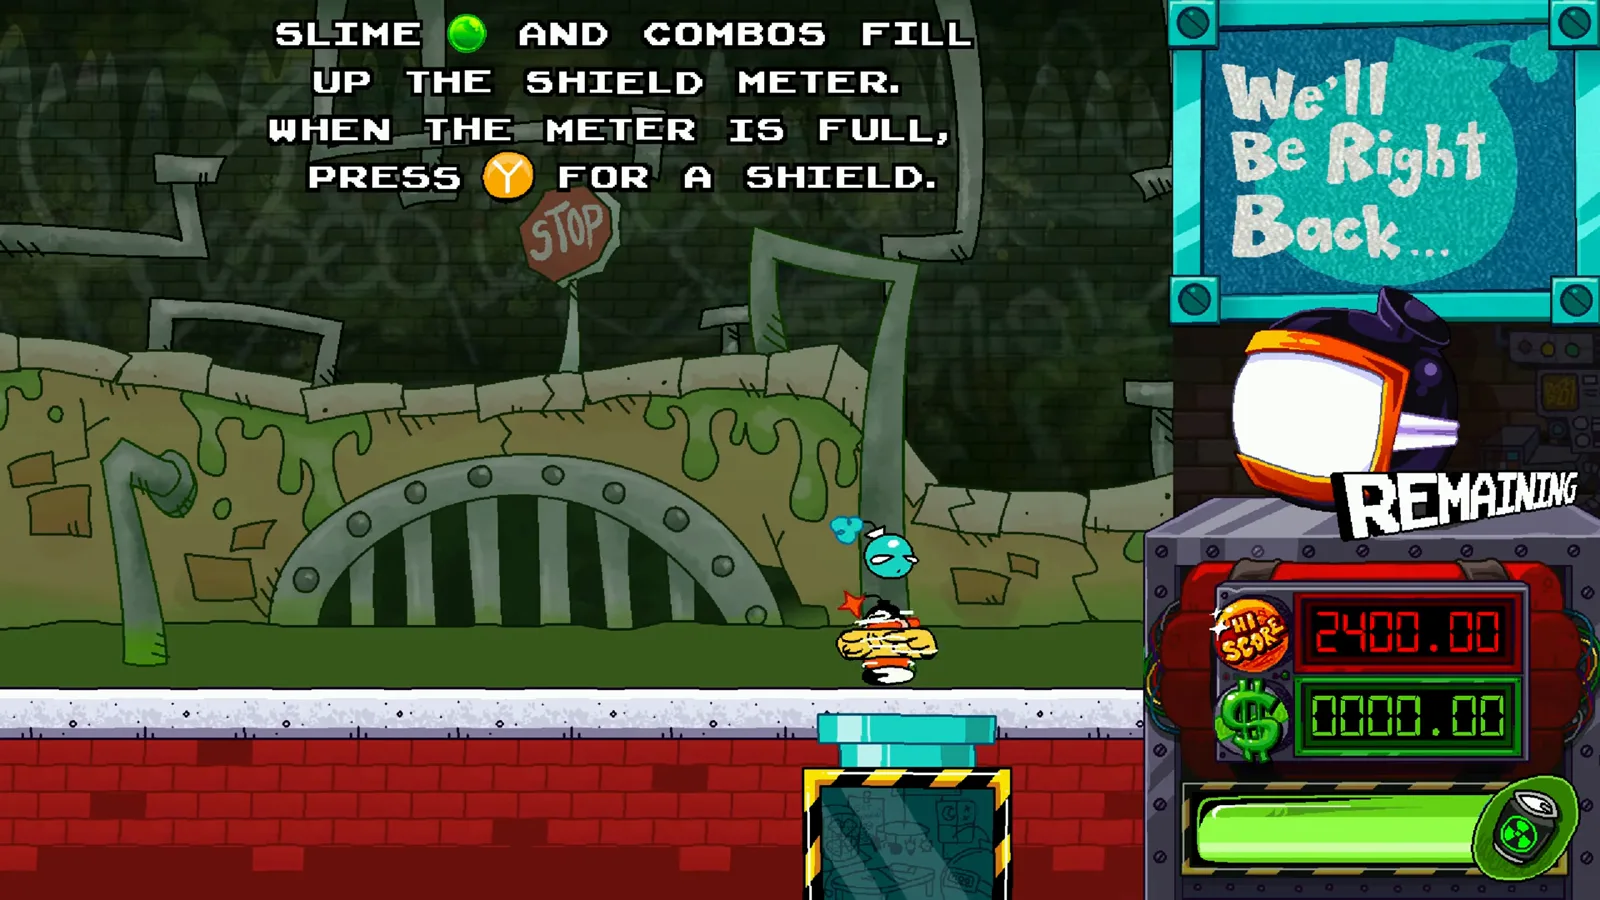
Lesson 7, Super Powers, at 4:39 in PhoneInk’s video. Game art (c) TALLGLASS.
What do the panels on the right mean?
The right-hand panel is the same in the release footage from the tutorials through the regular rounds, from top to bottom:
- A portrait box. It usually shows a “We’ll Be Right Back…” sign during the tutorials and a character portrait in regular rounds.
- The REMAINING counter next to a bomb icon.
- A red LED readout with an orange HI-SCORE badge. It read 2400.00 in every frame we checked, so we do not know what drives it.
- A green LED readout with a $ badge. It stays at 0000.00 through the tutorials, then moves during the rounds. It mostly rises (0004.25 in round 1, 0057.65 and 0102.10 in round 2, 0181.90 at the end of round 3, 0218.53 near the end of the footage in round 4), but it can also drop: it read 0184.05 and then 0181.90 ten seconds later in round 4. We do not know exactly what it measures.
- A green shield bar, which lesson 7 says fills with slime and combos.
How do combos work?
The only combo advice in the game’s own tutorial is to stack same-colored BOMs for higher combos and to use slime and combos to fill the shield meter. On screen, combos pop up as short labels such as x2 OK! and x3 NICE alongside a +$ amount. The Steam achievements Wow!! and Insane!! ask for a 5x and a 7x combo (see the achievements list). The exact scoring formula and what resets a combo are not verified.
What happens when you die?
The game keeps a death count: the ROUND CLEAR! banner shows DEATHS followed by a number. In the run we checked, banners read DEATHS: 0, DEATHS: 4 and DEATHS: 15 at the end of three different rounds. We could not tell whether that number is per round or a running total.
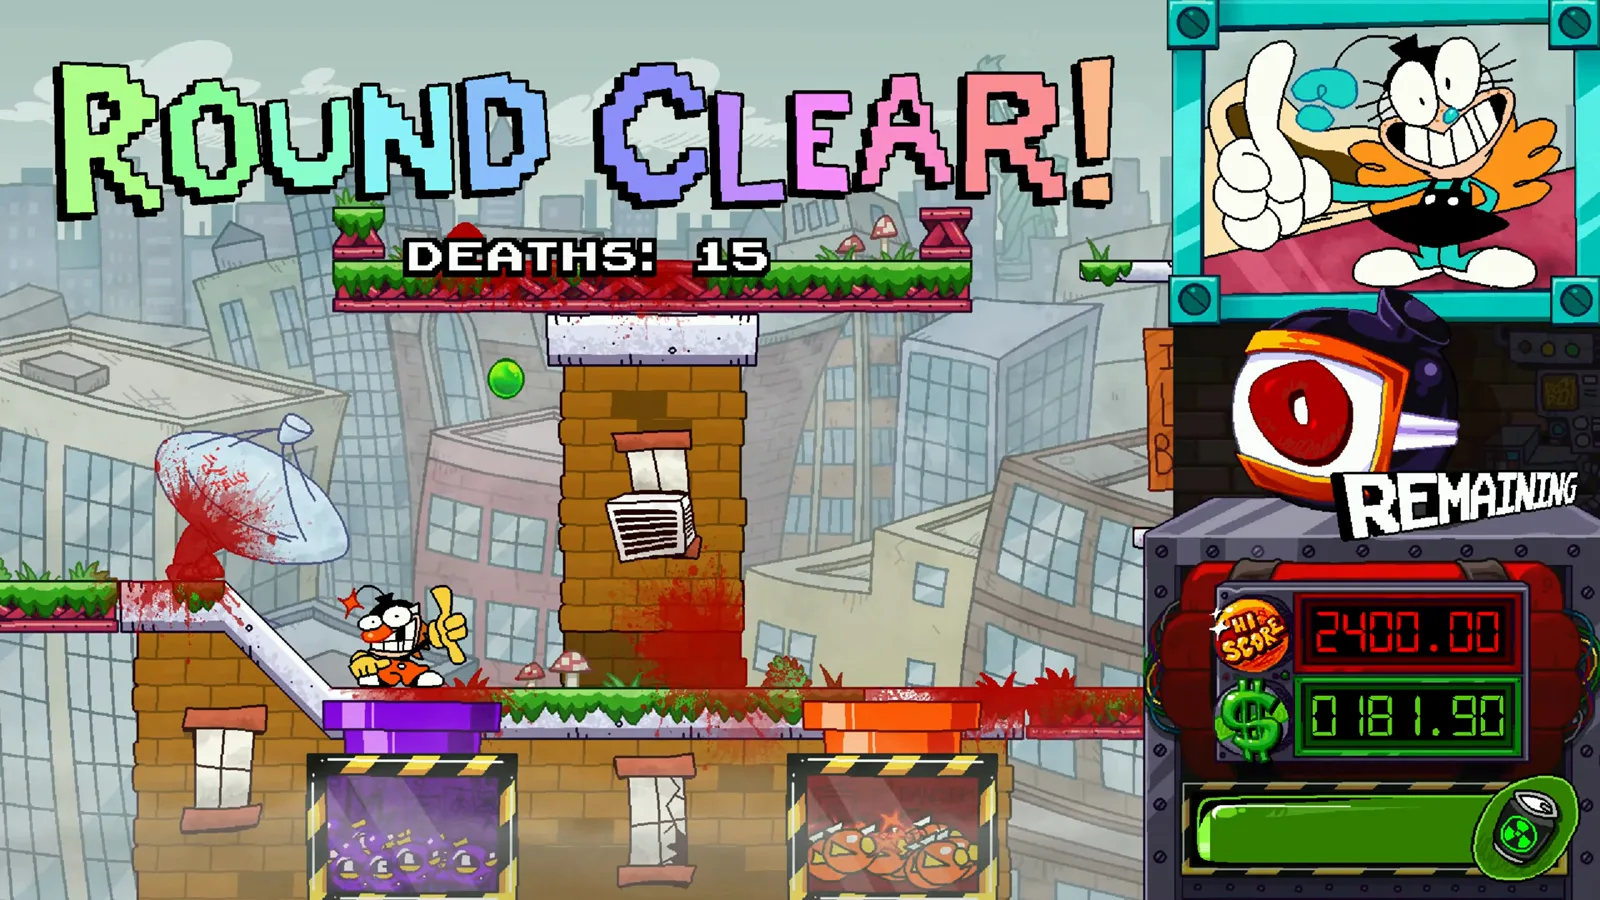
ROUND CLEAR! with DEATHS: 15 at 10:34 in PhoneInk’s video. Game art (c) TALLGLASS.
Death counts matter because three achievements ask you to finish a run in 30, 15 or 5 deaths or fewer, and one asks for none at all. The conditions are quoted on the achievements page.
Tips you can rely on
- Do the tutorial lessons properly. All seven take about two minutes in the footage, and every later round uses these moves.
- Learn the spin early. It is the button for both tossing a BOM into a pipe and setting one down gently.
- Stack before you throw. Lesson 6 and the combo achievements both point at stacking same-colored BOMs.
Watch the tutorials in action

BOOM! Buster Full Game First Look Gameplay by PhoneInk
The seven tutorial lessons start at 2:48 in this first-look video by PhoneInk, and the first regular round begins at 4:53. Video and game art belong to their creators and TALLGLASS.
FAQ
What is the goal of a round in BOOM! Buster?
How do you pick up and throw a BOM?
What happens if you put a BOM in the wrong pipe?
Can you skip the tutorial?
Related Articles
guides
BOOM! Buster Controls: Controller Prompts, Keyboard Status
Every move BOOM! Buster teaches in its tutorials, from jump to air-dash and toss, with the controller buttons shown on screen. Keyboard keys are unverified.
guides
What Is BOOM! Buster? Price, Platforms, Modes and Content
BOOM! Buster is a single-screen arcade platformer from TALLGLASS about sorting live bombs into pipes. Release date, price, co-op, content size and PC specs.
guides
BOOM! Buster Achievements: All 31 Steam Unlock Conditions
Complete list of all 31 BOOM! Buster Steam achievements with the official unlock conditions, grouped by campaign, B-side, combos, deaths and bonus rooms.
Was this helpful?
Thanks for the feedback!